Notice
This is a long-term, very much in-progress project, so this post currently serves primarily as a progress tracker and collection of notes on the project, along with some information what I’ve accomplished so far.
Presentation
A recreation of a 5 minute presentation I gave at Recurse Center for the project.
Inspiration
So, earlier this year I was working on my first React Native application, which was a small app to plan events. It was my first mobile project in general, and at the time I got started with it on a Windows machine to avoid the pains that I assumed may accompany mobile development package management.
It didn’t take long to realize that it’s very very hard to develop for IOS on anything other than a mac, because tooling to “talk” to iPhones for development relies on xCode. That means that I couldn’t use a physical iPhone, or even run an emulator (a “fake” phone running on my computer).

For Android development, Google is much nicer about it, and lets you run emulators and bridge a physical phone over on all platforms. They recommend using Android Studio, which is fine, but a pain in the neck. The process to create an emulator in android studio is pretty straight forward, but requires a lot of clicking and is quite tedious and magical. You can choose a “skin” and android image, sometimes you configure the virtual device a bit further with their gui, and then run it from the app.
I used it for the project, and it worked well enough for my needs. Metro, a
bundler that creates and ships APKs based on your react native project works
well with Android studio’s emulator, and it was fine at the time, and was only
moderately annoying to work with.
Android Development on Linux
Fast forward a few months, and I was returning to the project, but this time was
running NixOS. It was my first half of a Recurse Center
batch, and I was still figuring a lot of things out. One of the things that
nix claims to be very good at is reproducible builds, meaning that I would
expect packages in the nixpkgs package registry to “just work.”
So, I tried adding android-studio to my developer environment, and then ran
it. It launched!
I browsed through the configuration options to go and set up an emulator again, and, upon launching the emulator, it would say emulator booting, but fail to actually start.
Debugging this, as a pretty new nix user at the time, was painful. I ran
android studio from the command line, and enabled debug logs. It looked like
there were a whole bunch of dependencies not for android studio, but for the
emulators it was spawning. Part of the issue is that android studio usually
pulls emulator images when you set up the emulators, not when you install
android studio, so while the build of android studio that I got was working just
fine, the emulators that it was pulling were broken, likely because of upstream
changes.
Android Studio is very heavy though; it’s an entire Jetbrains IDE. I find it really clunky to use, and when things don’t work it’s a pain in the neck to debug since it’s a massive GUI desktop app that does so many things under the hood.
Plus, the licensing and codebase for it seems a bit sketchy and obstruce.
The code is under Apache-2.0, but: If one selects Help -> Licenses in Android Studio, the dialog shows the following: “Android Studio includes proprietary code subject to separate license, including JetBrains CLion(R) (www.jetbrains.com/clion) and IntelliJ(R) IDEA Community Edition (www.jetbrains.com/idea).” Also: For actual development the Android SDK is required and the Google binaries are also distributed as proprietary software (unlike the source-code itself).
I like open source tooling, and I don’t like magic. So, I decided that it would be productive to delve deeper and figure out how to do what it’s doing without the entire desktop app.
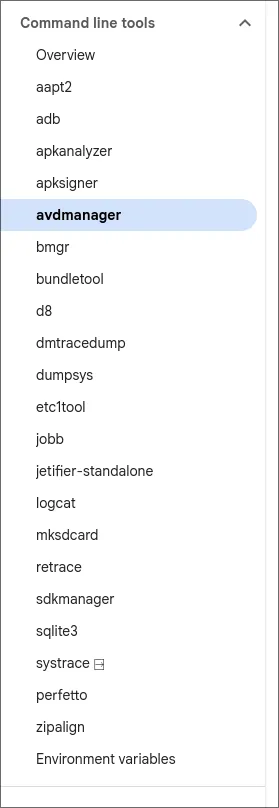
Android CLI Tooling
The general breakdown is that there’s an android SDK toolkit that provides you
with a ton of command line utilities for android development and debugging. This
SDK is included in distributions of android studio, and they are what Android
studio uses internally under the hood. Furthermore, nixpkgs already has
packaged them underandroid-tools (source
here).
Because the android build system is so annoying to deal with, someone created
a project to build these cli tools with cmake,
which is what the official nixpkgs package of them uses.
There’s a lot of CLI tools for dealing with android, but it turns out that there’s a few critical ones for getting an emulator up and running, and having a better conceptual understanding of the magic behind android studio.
First things first. You need to set ANDROID_SDK_ROOT to the directory with the
various binary cli tools we were just talking about (so like, if they’re in your
PATH, you can figure out where to set ANDROID_SDK_ROOTto by doing
which emulator, where emulator is an example of one of the many android
tools). Since I’m using nix , can easily keep things simple and automated with
a devshell. Okay, now we want to
Then we do something along the lines of
avdmanager create avd -n my_avd -k "system-images;android-30;google_apis;x86" -d "pixel"To create an “avd,” which is basically a configuration file that specifies the details of some virtual android device that could be run as an emulator. AVD stands for “android virtual device.”
We can check to make sure that our avd shows up by doing
avdmanager list avdAnd then, to run it, use
emulator -avd my_avdAnd then, if you’re on nix, you’ll be welcomed with a friendly message
informing you that there’s some dynamically linked dependency that you don’t
have, that you’ll have to wrap with LD_LIBRARY_PATH. And then again.
All of these android CLI tools are very powerful, and have a gagillion options that you can fiddle with.
I spent almost a week trying to get all the packages and settings fine tuned for
nix, and ended up getting very close — I had a bash script that would create
an avd, create a virtual sdcard for “external” device storage, and then
actually run the emulator. But for some reason I was getting a segfault, and it
wouldn’t launch, or give me any more useful error messages.
At that point I decided to do further research on android emulators on Nix, and found that Nix’s standard library itself has already solved the problem.
There’s “documentation” here that talks about android development on Nix. Here, they talk about some helper functions that you can use to create android SDKs with the exact binaries that you need, nicely purely packaged with nix.
With the help of that guide and reading some source, I was able to scrap together this flake, which gets you most of the lower level CLI tools you need for android development. It’s not entirely trivial, and not every tool is necessary for every task, but it’s quite good.
A working flake
{
  description = "React native environment";

  inputs = {
    nixpkgs.url = "github:NixOS/nixpkgs";
    flake-utils.url = "github:numtide/flake-utils";
  };

  outputs = { self, nixpkgs, flake-utils, ... }@inputs:
    flake-utils.lib.eachDefaultSystem (system:
      let
        pkgs = import nixpkgs {
          inherit system;
          config = {
            allowUnfree = true;
            android_sdk.accept_license = true;
          };
        };

        pinnedJDK = pkgs.jdk17;
        buildToolsVersion = "34.0.0";
        ndkVersion = "25.1.8937393";
        androidComposition = pkgs.androidenv.composeAndroidPackages {
          cmdLineToolsVersion = "8.0";
          toolsVersion = "26.1.1";
          platformToolsVersion = "34.0.4";
          buildToolsVersions = [ buildToolsVersion "33.0.1" ];
          includeEmulator = false;
          emulatorVersion = "30.3.4";
          platformVersions = [ "34" ];
          includeSources = false;
          includeSystemImages = false;
          systemImageTypes = [ "google_apis_playstore" ];
          abiVersions = [ "armeabi-v7a" "arm64-v8a" ];
          cmakeVersions = [ "3.10.2" "3.22.1" ];
          includeNDK = true;
          ndkVersions = [ ndkVersion ];
          useGoogleAPIs = false;
          useGoogleTVAddOns = false;
          includeExtras = [ "extras;google;gcm" ];
        };
      in {
        devShells.default = pkgs.mkShell rec {
          packages = [
            pkgs.android-tools
            pkgs.nodejs
            pkgs.corepack
            pkgs.zulu17
          ];

          JAVA_HOME = pinnedJDK;
          ANDROID_SDK_ROOT = "${androidComposition.androidsdk}/libexec/android-sdk";
          ANDROID_NDK_ROOT = "${ANDROID_SDK_ROOT}/ndk-bundle";
          GRADLE_OPTS = "-Dorg.gradle.project.android.aapt2FromMavenOverride=${ANDROID_SDK_ROOT}/build-tools/${buildToolsVersion}/aapt2";
          shellHook = ''
            export PATH=$PATH:${androidComposition.androidSdk}/bin
            adb start-server
            adb devices
          '';
        };
      });
}
An emulator, in 4 lines of Nix
After reading through all the source though, a super neat function caught my eye: emulate app. It wasn’t documented anywhere, but it was super promising. Here’s the entire source code, which is definitely worth reading over. It’s very similar to what I was doing, but they were able to figure out how to get all the flags just right.
{ composeAndroidPackages, stdenv, lib, runtimeShell }:
{ name
, app ? null
, platformVersion ? "33"
, abiVersion ? "armeabi-v7a"
, systemImageType ? "default"
, enableGPU ? false # Enable GPU acceleration. It's deprecated, instead use `configOptions` below.
, configOptions ? (
    # List of options to add in config.ini
    lib.optionalAttrs enableGPU
      (lib.warn
        "enableGPU argument is deprecated and will be removed; use configOptions instead"
        { "hw.gpu.enabled" = "yes"; }
      )
  )
, extraAVDFiles ? [ ]
, package ? null
, activity ? null
, androidUserHome ? null
, avdHomeDir ? null # Support old variable with non-standard naming!
, androidAvdHome ? avdHomeDir
, deviceName ? "device"
, sdkExtraArgs ? { }
, androidAvdFlags ? null
, androidEmulatorFlags ? null
}:

let
  sdkArgs = {
    includeEmulator = true;
    includeSystemImages = true;
  } // sdkExtraArgs // {
    cmdLineToolsVersion = "8.0";
    platformVersions = [ platformVersion ];
    systemImageTypes = [ systemImageType ];
    abiVersions = [ abiVersion ];
  };

  sdk = (composeAndroidPackages sdkArgs).androidsdk;
in
stdenv.mkDerivation {
  inherit name;

  buildCommand = ''
    mkdir -p $out/bin

    cat > $out/bin/run-test-emulator << "EOF"
    #!${runtimeShell} -e

    # We need a TMPDIR
    if [ "$TMPDIR" = "" ]
    then
        export TMPDIR=/tmp
    fi

    ${if androidUserHome == null then ''
      # Store the virtual devices somewhere else, instead of polluting a user's HOME directory
      export ANDROID_USER_HOME=$(mktemp -d $TMPDIR/nix-android-user-home-XXXX)
    '' else ''
      mkdir -p "${androidUserHome}"
      export ANDROID_USER_HOME="${androidUserHome}"
    ''}

    ${if androidAvdHome == null then ''
      export ANDROID_AVD_HOME=$ANDROID_USER_HOME/avd
    '' else ''
      mkdir -p "${androidAvdHome}"
      export ANDROID_AVD_HOME="${androidAvdHome}"
    ''}

    # We need to specify the location of the Android SDK root folder
    export ANDROID_SDK_ROOT=${sdk}/libexec/android-sdk

    ${lib.optionalString (androidAvdFlags != null) ''
      # If NIX_ANDROID_AVD_FLAGS is empty
      if [[ -z "$NIX_ANDROID_AVD_FLAGS" ]]; then
        NIX_ANDROID_AVD_FLAGS="${androidAvdFlags}"
      fi
    ''}

    ${lib.optionalString (androidEmulatorFlags != null) ''
      # If NIX_ANDROID_EMULATOR_FLAGS is empty
      if [[ -z "$NIX_ANDROID_EMULATOR_FLAGS" ]]; then
        NIX_ANDROID_EMULATOR_FLAGS="${androidEmulatorFlags}"
      fi
    ''}

    # We have to look for a free TCP port

    echo "Looking for a free TCP port in range 5554-5584" >&2

    for i in $(seq 5554 2 5584)
    do
        if [ -z "$(${sdk}/bin/adb devices | grep emulator-$i)" ]
        then
            port=$i
            break
        fi
    done

    if [ -z "$port" ]
    then
        echo "Unfortunately, the emulator port space is exhausted!" >&2
        exit 1
    else
        echo "We have a free TCP port: $port" >&2
    fi

    export ANDROID_SERIAL="emulator-$port"

    # Create a virtual android device for testing if it does not exist
    if [ "$(${sdk}/bin/avdmanager list avd | grep 'Name: ${deviceName}')" = "" ]
    then
        # Create a virtual android device
        yes "" | ${sdk}/bin/avdmanager create avd --force -n ${deviceName} -k "system-images;android-${platformVersion};${systemImageType};${abiVersion}" -p $ANDROID_AVD_HOME/${deviceName}.avd $NIX_ANDROID_AVD_FLAGS

        ${builtins.concatStringsSep "\n" (
          lib.mapAttrsToList (configKey: configValue: ''
            echo "${configKey} = ${configValue}" >> $ANDROID_AVD_HOME/${deviceName}.avd/config.ini
          '') configOptions
        )}

        ${lib.concatMapStrings (extraAVDFile: ''
          ln -sf ${extraAVDFile} $ANDROID_AVD_HOME/${deviceName}.avd
        '') extraAVDFiles}
    fi

    # Launch the emulator
    echo "\nLaunch the emulator"
    $ANDROID_SDK_ROOT/emulator/emulator -avd ${deviceName} -no-boot-anim -port $port $NIX_ANDROID_EMULATOR_FLAGS &

    # Wait until the device has completely booted
    echo "Waiting until the emulator has booted the ${deviceName} and the package manager is ready..." >&2

    ${sdk}/libexec/android-sdk/platform-tools/adb -s emulator-$port wait-for-device

    echo "Device state has been reached" >&2

    while [ -z "$(${sdk}/libexec/android-sdk/platform-tools/adb -s emulator-$port shell getprop dev.bootcomplete | grep 1)" ]
    do
        sleep 5
    done

    echo "dev.bootcomplete property is 1" >&2

    #while [ -z "$(${sdk}/libexec/android-sdk/platform-tools/adb -s emulator-$port shell getprop sys.boot_completed | grep 1)" ]
    #do
        #sleep 5
    #done

    #echo "sys.boot_completed property is 1" >&2

    echo "ready" >&2

    ${lib.optionalString (app != null) ''
      # Install the App through the debugger, if it has not been installed yet

      if [ -z "${package}" ] || [ "$(${sdk}/libexec/android-sdk/platform-tools/adb -s emulator-$port shell pm list packages | grep package:${package})" = "" ]
      then
          if [ -d "${app}" ]
          then
              appPath="$(echo ${app}/*.apk)"
          else
              appPath="${app}"
          fi

          ${sdk}/libexec/android-sdk/platform-tools/adb -s emulator-$port install "$appPath"
      fi

      # Start the application
      ${lib.optionalString (package != null && activity != null) ''
          ${sdk}/libexec/android-sdk/platform-tools/adb -s emulator-$port shell am start -a android.intent.action.MAIN -n ${package}/${activity}
      ''}
    ''}
    EOF
    chmod +x $out/bin/run-test-emulator
  '';
}
Basically, they generate a bash script that “hard codes” paths to the various
packages (things like ${pkgs.hello} here evaluate to
/nix/store/jfe...hash...jfei), which are locations of specific, version locked
dependencies.
And it works! Using this function turns out to be extremely trivial. It’s literally 4 lines of nix, since you don’t need to build an android composition to use the function, even though you can.
So, here it is. Just a few lines of nix, and then nix run, and you have
yourself a full on, working, ready to go android emulator, running on your
computer.
emulator = pkgs.androidenv.emulateApp {
    name = "AndroidEmulator";
    platformVersion = "30";
    abiVersion = "x86_64"; # armeabi-v7a, mips, x86_64
    systemImageType = "google_apis_playstore";
};
It’s so crazy cool, it just works!
After all of the suffering to get a good working android emulator, and I had an idea: what if I could solve this problem for everyone, on every OS, everywhere, once and for all? What if I could offer android phones as a service, just using nix builds?
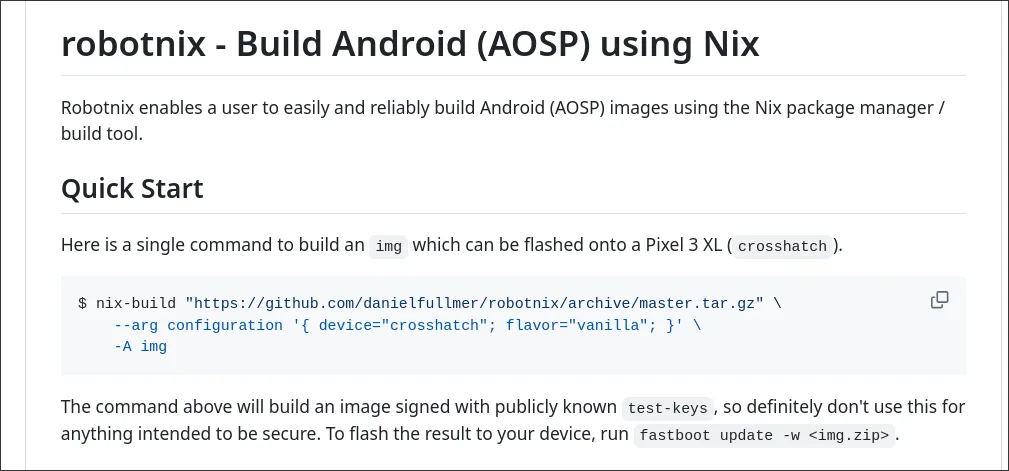
RobotNix
One of the massive pain points for Android development is actually building Android itself. Google provides scattered documentation that helps with this process, but it’s very disparate, and just about everyone uses prebuilt images as a result.
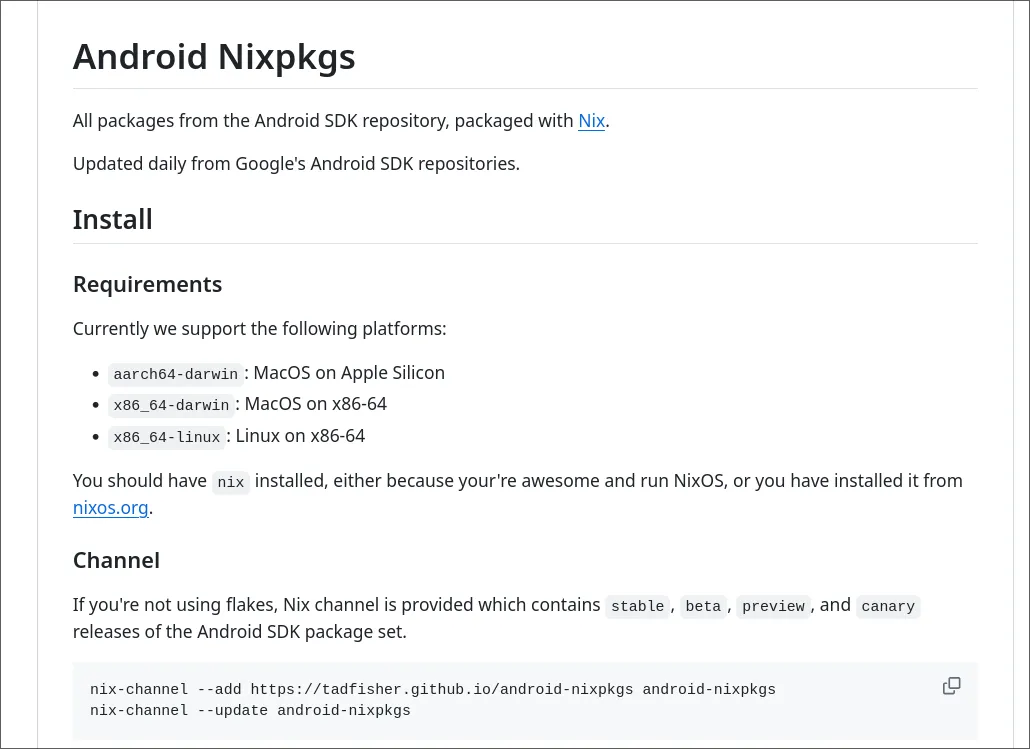
In the process of tinkering, I
came across a project that packaged all google android images with nix.
It seemed pretty neat and promising here, since it would solve the issue of
having images change over time in ways that break my setup because of differing
dependencies.
I spent a long time trying to get an emulator working using the images it provided, and in the process I learned a ton about android cli tooling.
Tad Fisher’s project that I just mentioned also packages android sdk tools too, and his are much finer grain.
 android-sdk.packages = sdk: with sdk; [
    build-tools-34-0-0
    cmdline-tools-latest
    emulator
    platforms-android-34
    sources-android-34
];
ADB
One of the most important android cli tools is adb, or
android debug bridge. adb is a CLI tool (and has a socket interface) that is
used to communicate with android devices.
It automatically can pick up on all android devices plugged into your computer over USB, running on the local network with wireless debugging enabled, and even emulators (which will be important later).
It’s very powerful. It can do just about everything. To use adb for android
development, usually you begin by running
adb start-serverWhich starts a server running on a socket on your computer that lets you use the
adb cli client, or other community clients, to manipulate android devices.
What isn’t as commonly known is that there’s also a tcp/ip mode for adb with
adb tcpip. Once adb is running, you can then list out android devices with
adb devicesAnd start issuing commands. You can do things like
adb shellto enter a shell on the android phone itself.adb pushto push a file onto the device, andadb pullto yoink files off itadb (un)(in)stallto un/install apks (android apps) to the deviceadb input tap x yto tap the screen at a specific spot
and a ton of other manipulation commands to do things like entering text input, capturing screenshots, recording audio, and more.
It’s super powerful, and will play an important role in this project, as I’ll discuss a bit later.
What I’ve learned while researching these tools is that they are really horribly documented. Google has docs that talk about the general processes, and, if you can figure out where to find things, you can get the source code for the CLI programs too. But, it seems like their main intent is to try to get people to use Android Studio as much as possible.
Appetize.io
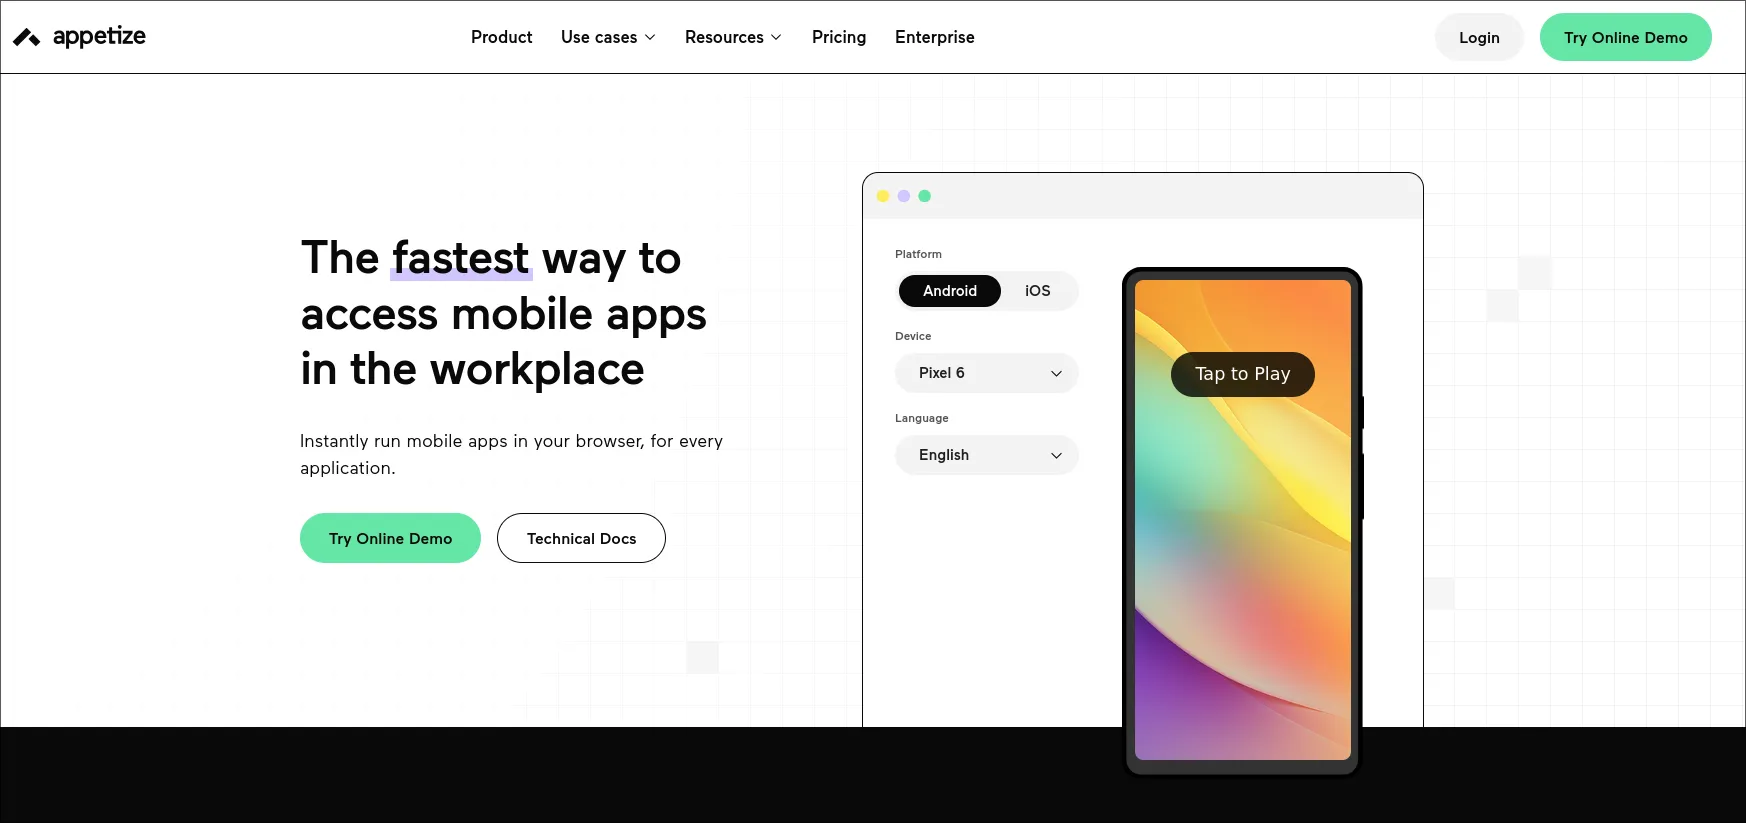
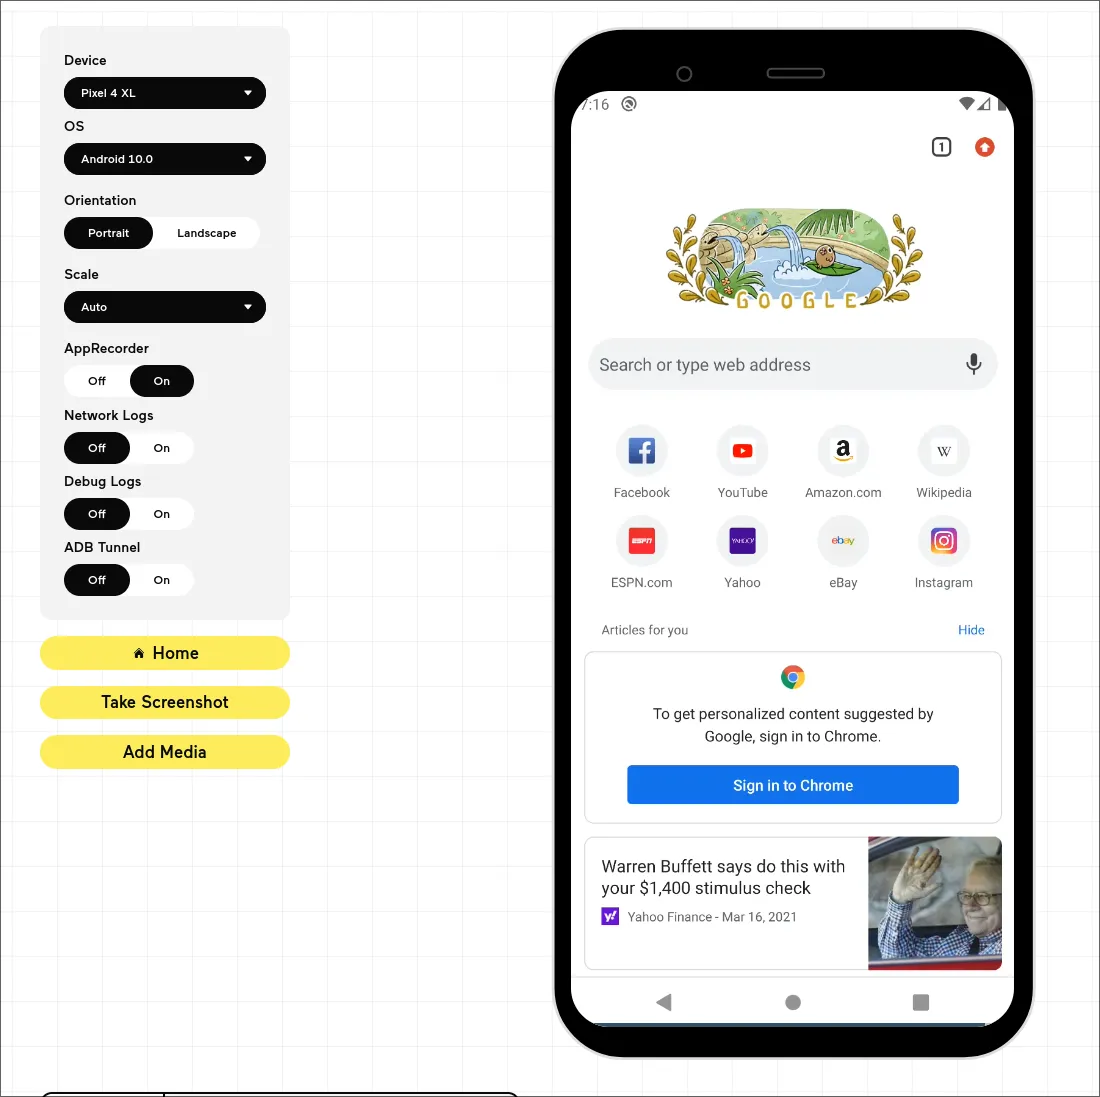
Appetize.io is a company that offers roughly just that. I
found out about them later on when reviewing the react native documentation —
all the little phone widgets that say “Expo” on them are powered by
appetize.io devices. They let you spin up android or IOS devices, and then
embed them in webpages with decently low latency. They also expose an API, so
that you can do CI/CD testing with proper phones.

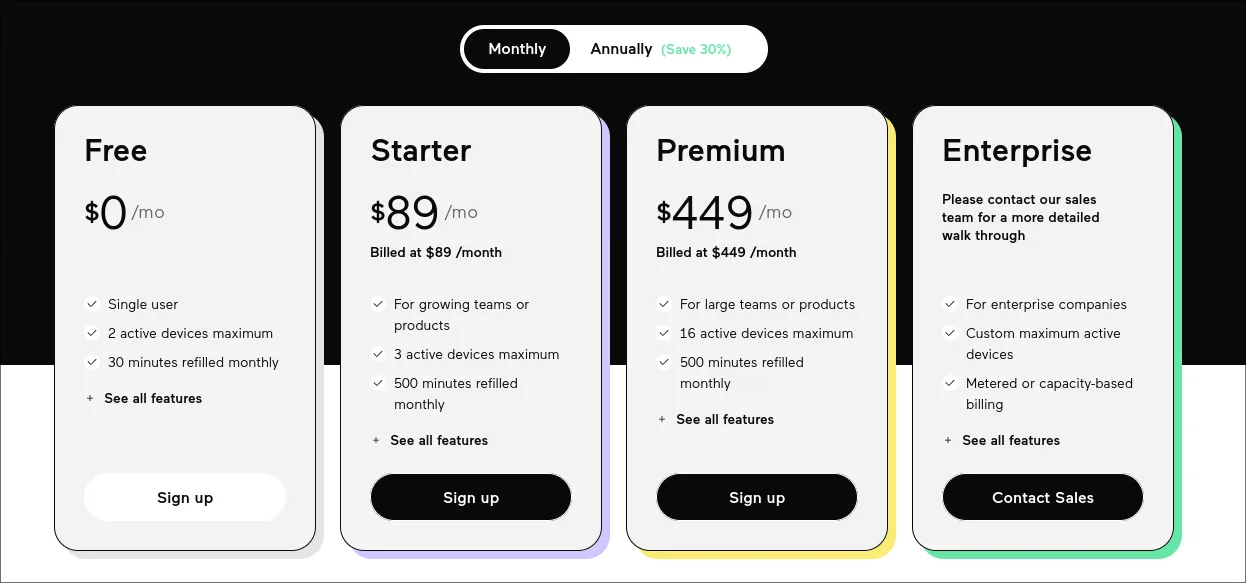
But appetize comes at a cost. It’s very expensive, and very restrictive. It isn’t open source, and definitely isn’t nixified.
It’s worth mentioning them here before going further though, since what they do is genuinely really cool. Their main thing is automated testing, although they may also be able to do android development with the regular SDK tools too.
Ideation
So, I started brainstorming. My idea was to stream nix packaged android
emulators to web browsers.
One other super cool thing that nix rocks at is containerizing things. Nix’s
standard library provides
utilities to create docker base images
that have all of the dependencies and transient dependencies of a nix derivation
(build).
This means that you can implicitly refer to libraries in the function nix provides that creates docker images, and if they get mentioned then they get “baked” into the container. Part of what’s so nice about dockering android emulators is that the processes live and die with the containers, since the qemu processes that the emulators create are kind of a pain to track and to kill.
I am still working on getting them working in a docker container, but what I currently have, which is pretty close to what I expect to work, looks like this
{
  pkgs,
  android-tools,
  system,
  ...
}: let
  run-android-emulator = import ./emulator.nix {inherit pkgs;};
  android-sdk = import ./android-sdk.nix {inherit pkgs system android-tools;};
in
  pkgs.dockerTools.buildImage {
    name = "android-emulator";
    tag = "latest";

    copyToRoot = pkgs.buildEnv {
      name = "root";
      pathsToLink = ["/bin"];
      paths = [
        pkgs.jdk
        pkgs.coreutils
        pkgs.bash
        pkgs.busybox
        pkgs.bun
        android-sdk
      ];
    };

    config = {
      Env = [
        "JAVA_HOME=${pkgs.jdk}"
      ];
      # has the script that uses the emulate-app function
      Cmd = ["./${run-android-emulator}/bin/android-emulator"];
    };

    extraCommands = ''
      mkdir -p tmp
    '';
  }
Which does basically exactly what I just explained — although we do need some dependencies that I didn’t reference directly off of a nix object, like coreutils, and cli things like grep.
The browser?
My goal was to have the easiest, most streamlined devex possible for the
project. So, ideally the final product for the end user could just be a react
component, or even an iframe eventually. Right now, the interface is this.
export default function App() {
  return <Android ip={["ws://127.0.0.1:8188"]} apiSecret="secret" />
}
Streaming
The first step is to stream android at as low latency as possible out of the phone. As close to literal 0 as possible (so in reality, ideally <300ms). Doing this, however, is actually pretty nontrivial.
The first step is figuring out how we can stream the screen out of the android
device. Obviously this is possible, because when you run android emulators
(without the -no-window flag) you get a window that shows the screen of the
android device and is interactive. Android studio also natively provides this
feature.
adb, which we talked about earlier, does do this out of the box with a built
in android utility called screenrecord. More information about that can be found
here.
To use it, it looks something like this…
sudo apt-get install adb ffmpeg
adb exec-out screenrecord --output-format=h264 - |
   ffplay -framerate 60 -probesize 32 -sync video  -
It does work, but unfortunately the latency is pretty high. My tests got about 6
seconds of latency, although this stackoverflow post’s video seems to have
gotten about a second or less with some ffmpeg tuning. I may return to this
later, but for now I am using what I believe to be a better alternative,
scrcpy.
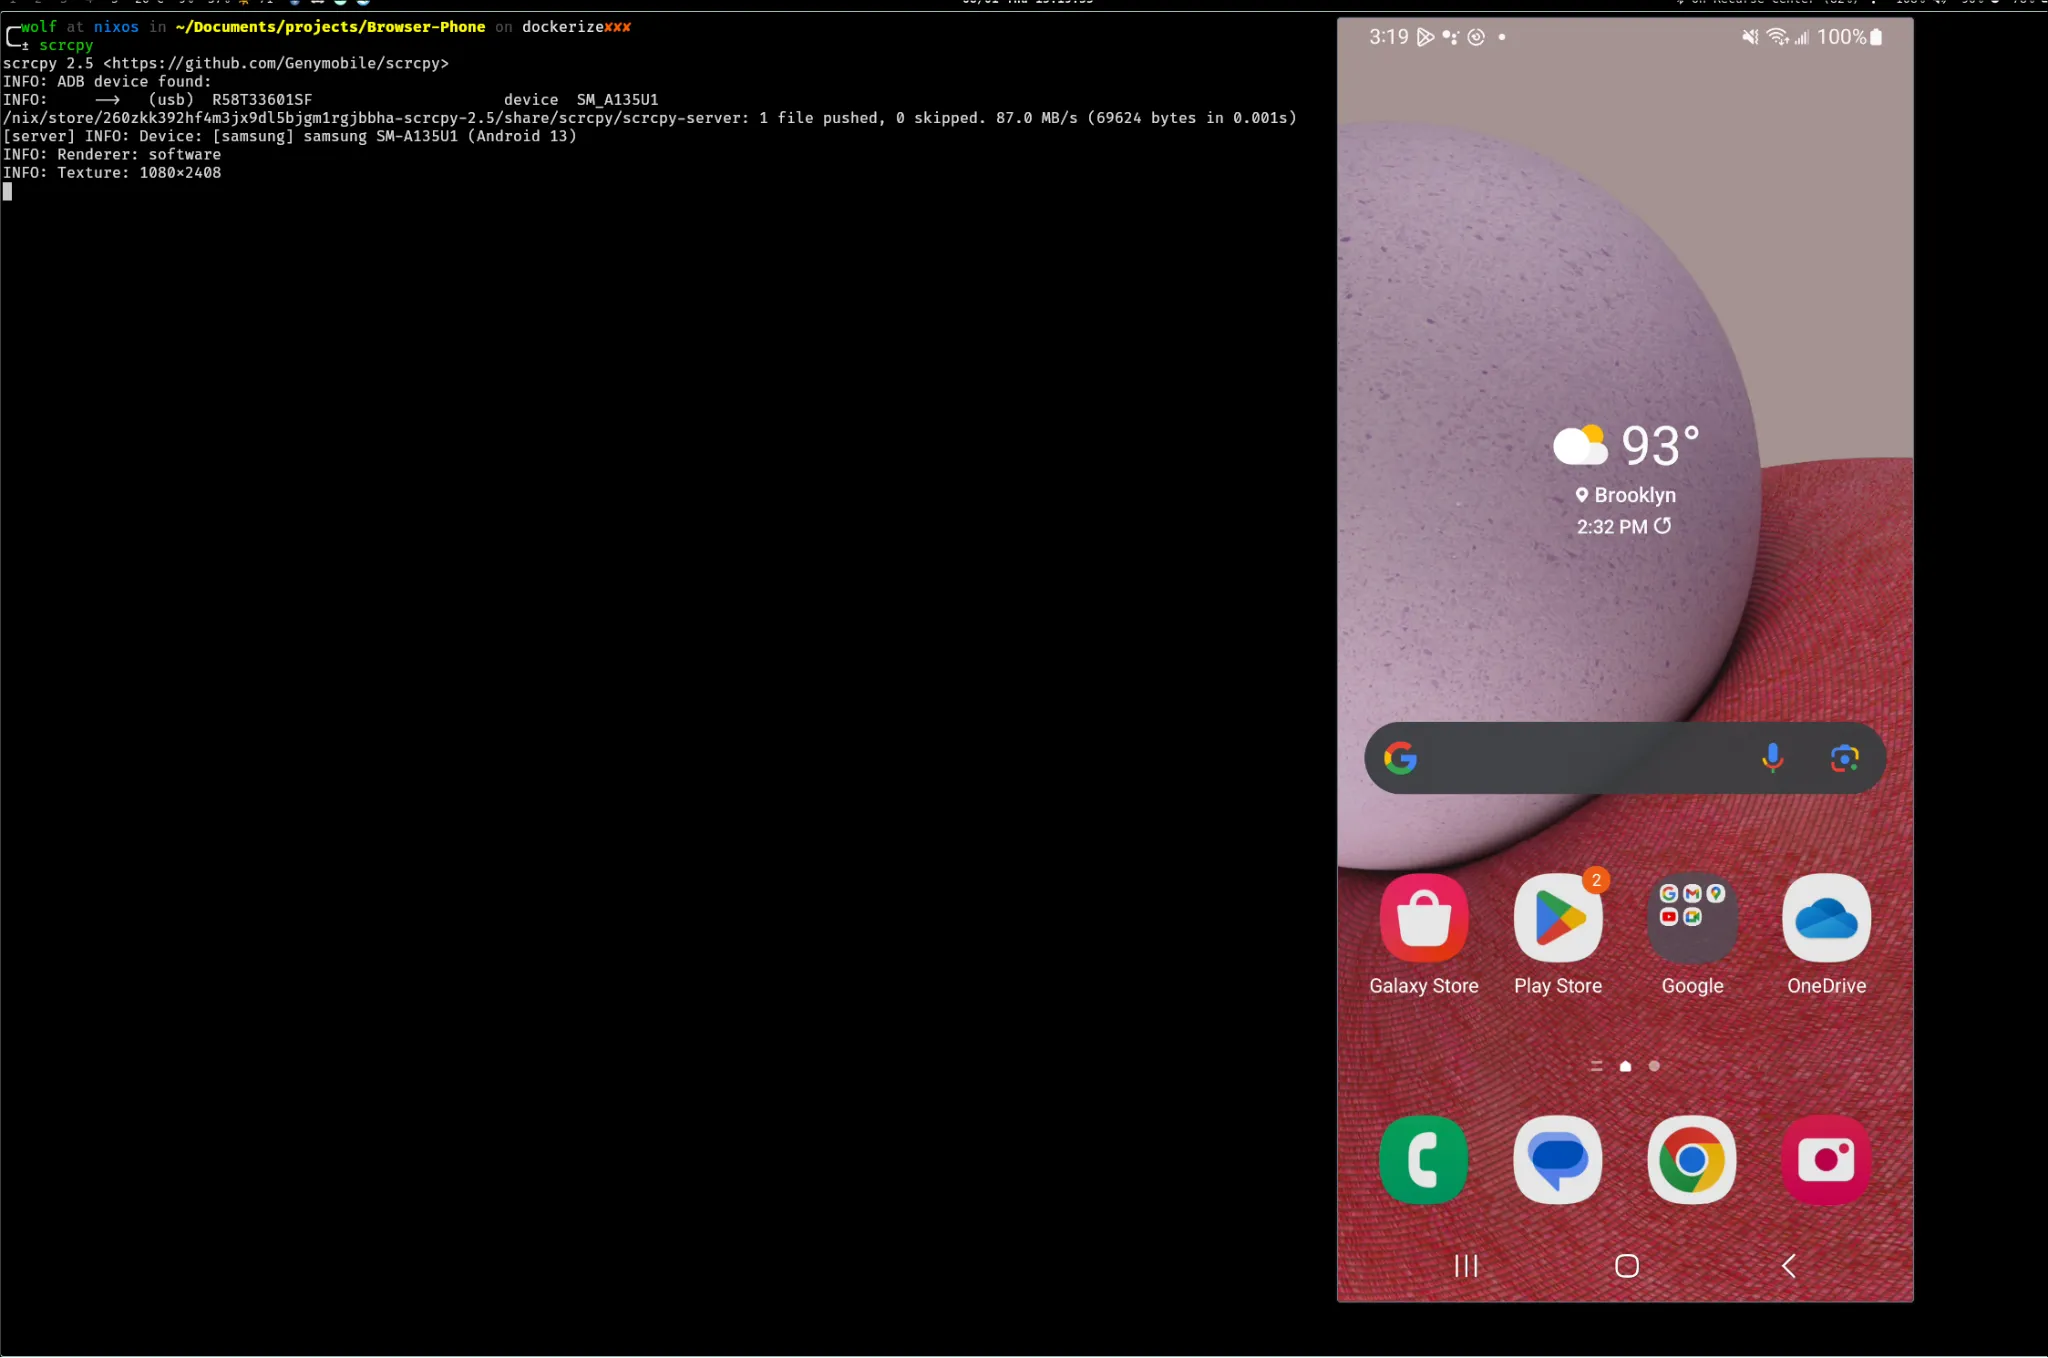
Scrcpy
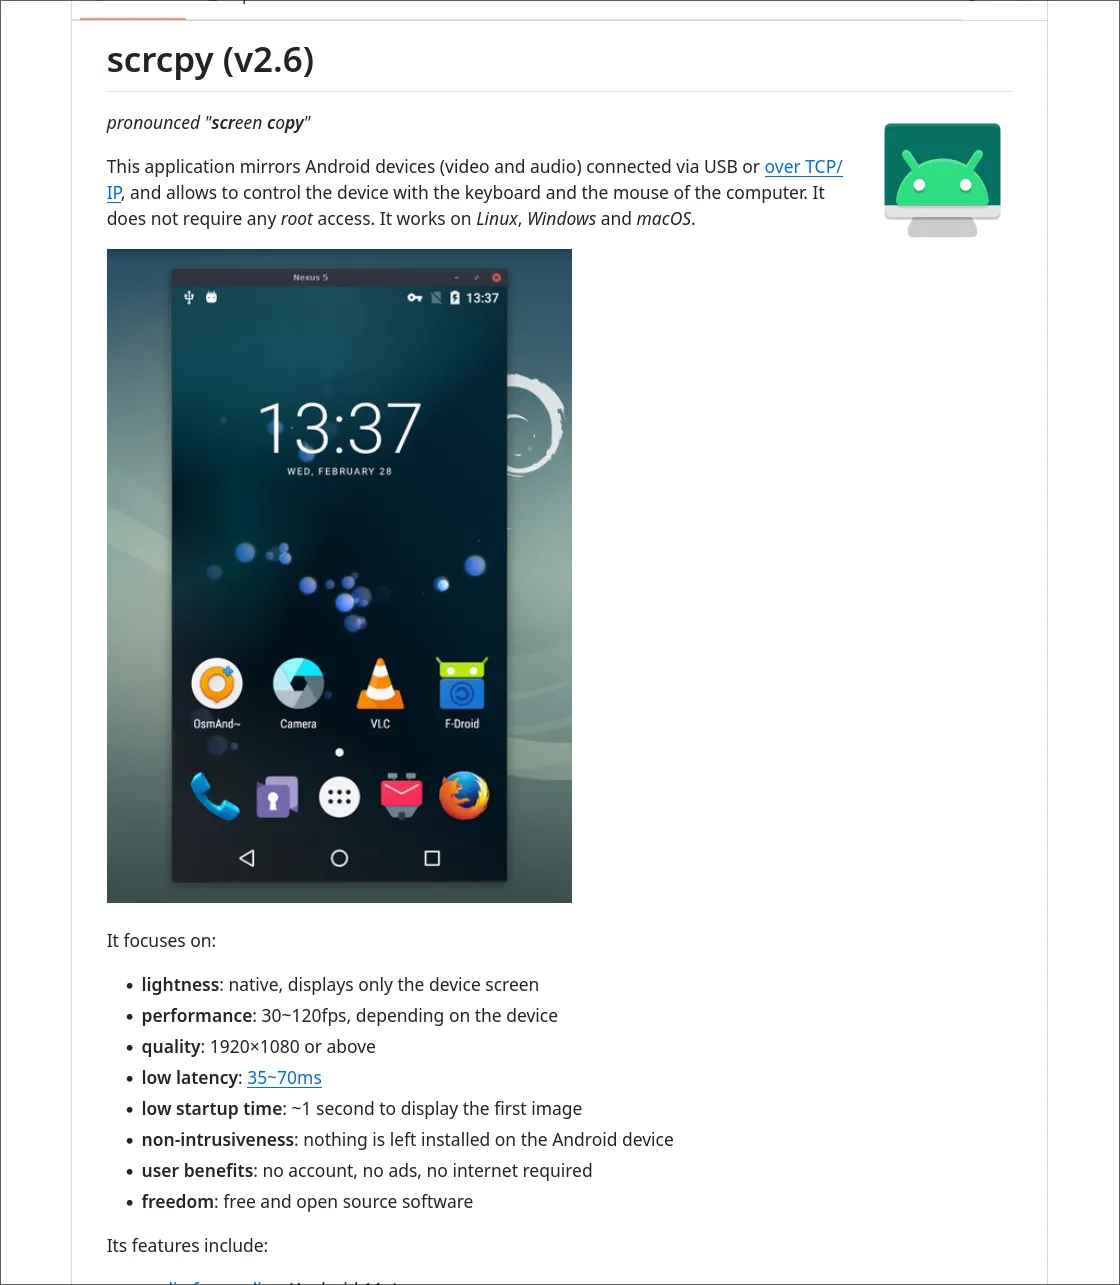
Scrcpy (“screen copy”) is a 3rd party utility that lets you stream an android
device to a window at extremely low latency (30ms or less!). It “just works,”
and is available on nixpkgs (nix package manager). Using it is literally as
simple as plugging in an android device, or running an emulator (headless or
headed, it doesn’t care), and then running
scrcpyAnd a window will open up on your computer with scrcpy, which has a live
stream of the screen of the android phone. The window it opens up is interactive
and is very responsive, and audio works out of the box too.
The client (the window it opens up) has support for more advanced things too.
So, they seem to have solved the issue of adb having bad latency, but how?
To figure out how scrcpy works behind the scenes, they lay out a general schematic in their docs for contributors. I’m not going to reiterate everything they say there, but there are a few important takeaways if I want to use scrcpy’s system of streaming at low latency.
The general idea of how scrcpy works is that you run it, and it ships a apk
(android app) to the phone in its /tmp directory (which android phones have,
they are also unix!). This apk exposes a server on the android phone on a
scrcpy port on the phone, which then the scrcpy client can access and send
data through.
This scrcpy server that runs on the phone is implemented in java (which most
android apps are), and acts as just a server running in the background.
It turns out that scrcpy streams out data over three “channels,” where the
first connection gets a connection to stream video, followed by audio, and
finally data (interactions like gestures, which scrcpy also handles itself with
a super low-latency custom binary interface).
Their client itself is very complex, and is implemented in raw C and uses some very advanced frameworks to optimize for very high performance. That’s less relevant here.
Hijacking Scrcpy
Knowing that scrcpy is just using a server running on the phone was enticing though.
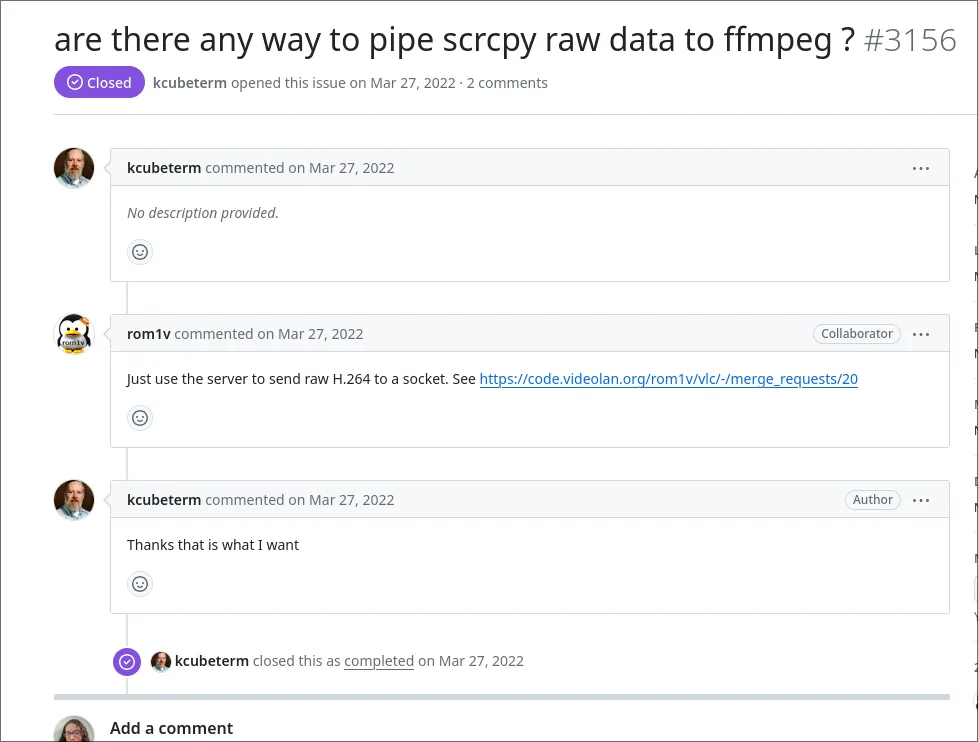
At this point, I really just wanted to pipe the video into ffmpeg so that I
could do things with it, since I still didn’t know how I would stream it, but I
knew that pretty much no matter what ffmpeg should be able to do the necessary
forwarding.
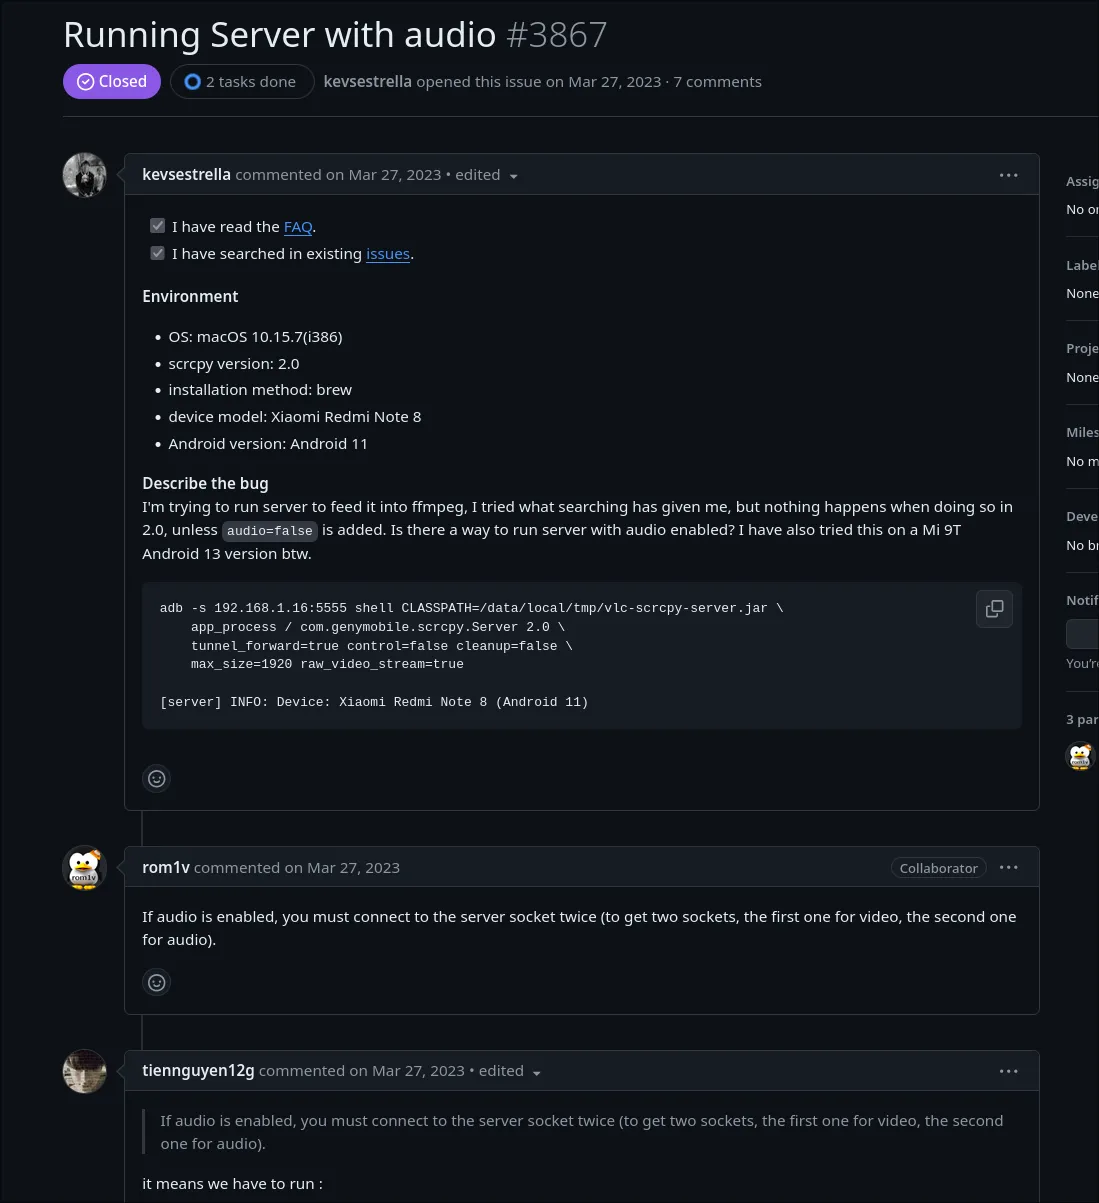
I did a bit of googling, and it looks like it is possible to do. I found a github issue, with a link to a VLC (the video viewing program) PR that fixes a latency issue having to do with how VLC throttles video stream outputs.
I was able to follow their steps, and the main pain point was getting adb to
forward a tcp port.
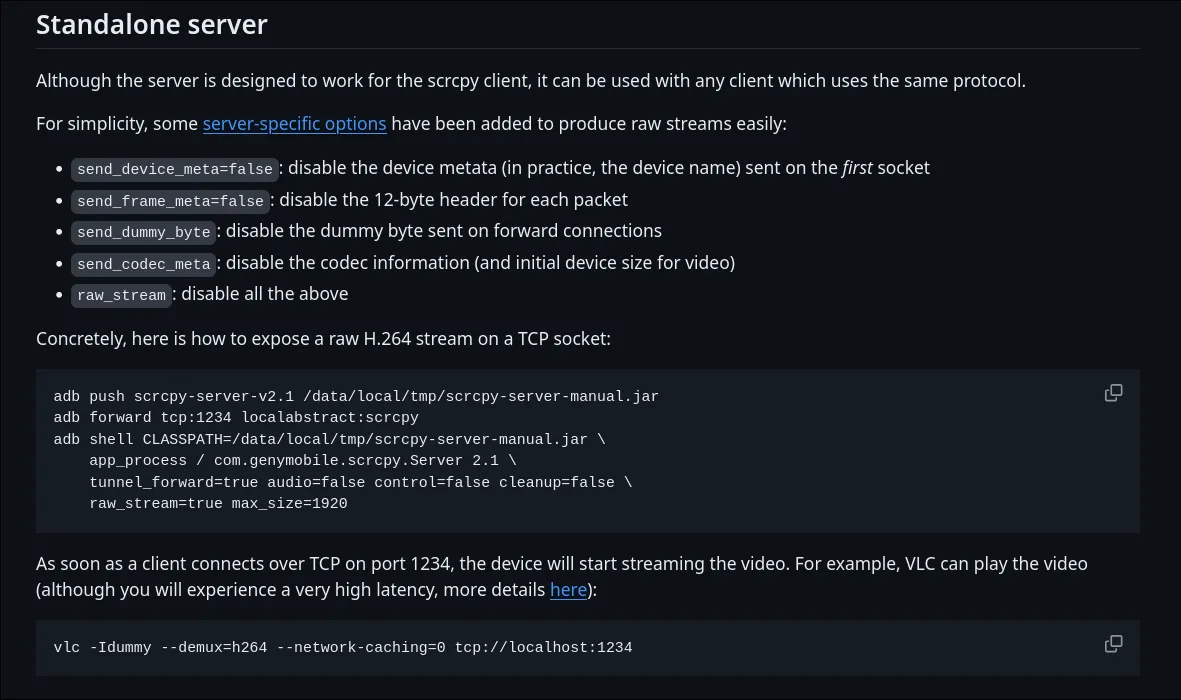
To use scrcpy to stream video output, you need to put and then start scrcpy
on the phone, and then remap the port on the phone that scrcpy is using to a
different port on your computer.
They provide an example script that shows how to do this, which is this
adb push scrcpy-server-v2.1 /data/local/tmp/scrcpy-server-manual.jar
adb forward tcp:1234 localabstract:scrcpy
adb shell CLASSPATH=/data/local/tmp/scrcpy-server-manual.jar \
    app_process / com.genymobile.scrcpy.Server 2.1 \
    tunnel_forward=true audio=false control=false cleanup=false \
    raw_stream=true max_size=1920
It’s not that bad. Another important thing here is that you need to set
raw_stream to false, since usually scrcpy sends some metadata at the start
of streams, which could stop ffmpeg from correctly interpreting the stream.
I found
this great medium post
that talks about how adb forward works, since it is horribly documented. They
mention
SERVICES.txt,
which has even more helpful docs.
I didn’t end up needing to fiddle around much with the default command that they say to use to forward the port, but I like having an understanding of how it works.
So, at this point I have a working script that can copy scrcpy over to an
android phone, run it on the phone, and then stream out the screen.
Now, what’s actually coming out of the port? Raw h264 video. Great! Viewing the
screen using the vlc command they say to try does work, but it is very
very laggy just like they say.
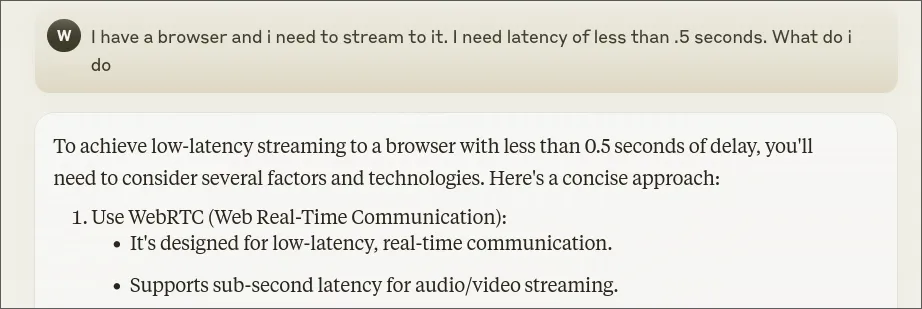
WebRTC?
Okay, I now (kinda) have a working stream coming out of the android device. This is pretty sick. Now comes the hard part… how do I take this output stream and get it to a web browser, with as low latency as possible.
Streaming to a browser
I did some research here, and there’s a ton of different streaming protocols that browsers support. A google search reveals many, like
- HLS
- WebRTC
- Real-time Messaging Protocol (Rtmp)
- Secure Reliable Transport (Srt)
- Real-time Streaming Protocol (Rtsp)
- Microsoft Smooth Streaming
- RTMP
- RTSP
HLS is really nice, it’s just relaying video live over http, and you can access
the media directly through a <video> element. Also, ffmpeg supports
streaming out <video> out of the box, which is nice. Unfortunately though, it
adds a lot of latency. To achieve the latency I want in this case, I really
don’t have any option other than WebRTC.
WebRTC is a peer to peer browser streaming protocol. It’s pretty simple to use since browsers have a good unified API for it, where you essentially have a signaling websocket server that tells clients when and whom to connect to, and then they can stream things to each other from the browser itself, like video camera output.
That’s great, but in my case I am doing a very centralized broadcast. I have media streaming off of a server, and want to ship that media to browsers directly. This is something that WebRTC isn’t really designed for.

There’s a few implementations of the WebRTC protocol, like Google’s official c++ one, or a community rewrite in rust (of course). To use them, there are projects like node webrtc, which expose a javascript API to set up webrtc connections. The issue here is that I would have to implement a lot of the handshake process myself, even if I didn’t need to actual manage the packets and connection stuff myself, which is a lot of work that I rather not get caught up in.
It turns out that I’m not the first person who has wanted extremely low latency server based WebRTC, and there’s tools that do roughly exactly what I was trying to do. There’s a super cool project called Janus Gateway that is designed to be a centralized WebRTC server.
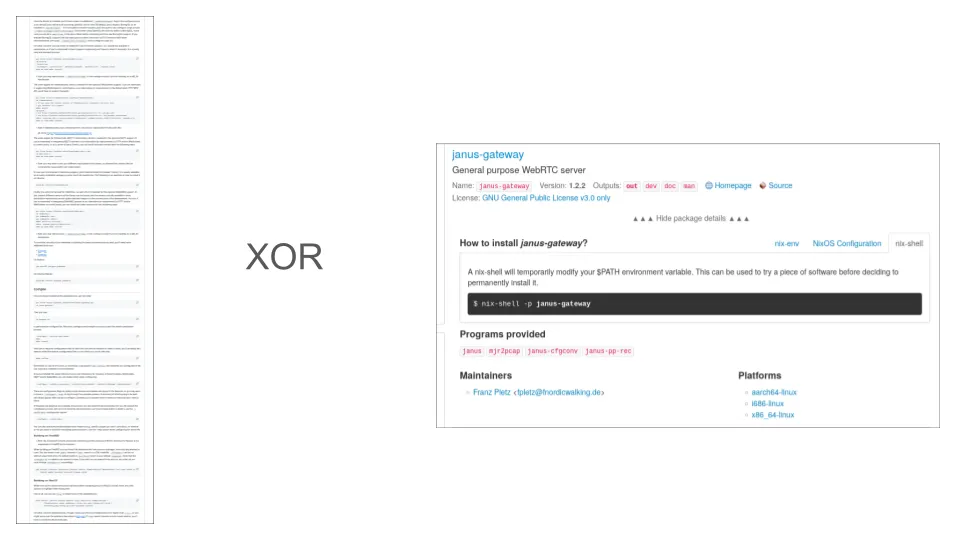
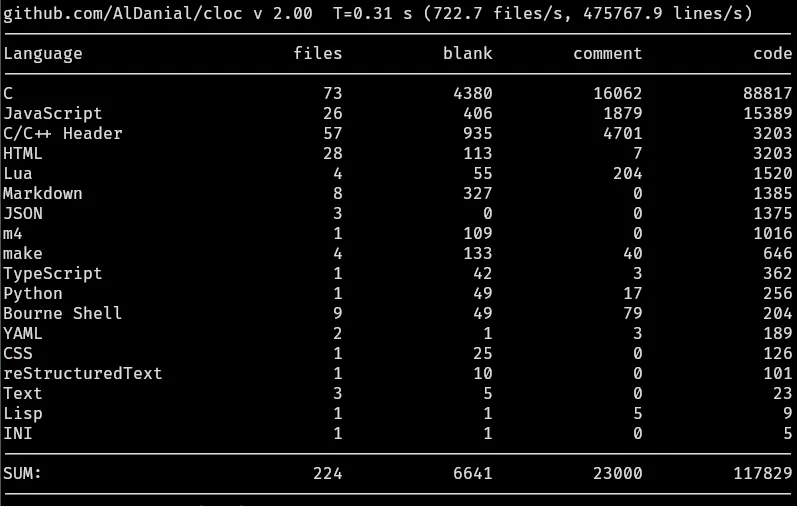
It can do a ton of different things, and is a very large C project. The build
process is a huge pain in the neck, but thankfully it was already packaged with
nix, so I didn’t need to deal with it.
The important thing to know about Janus Gateway is that it has a whole bunch of plugins to do common WebRtc media server tasks.
There are a whole bunch documented on their website here. Some fun ones:
- VideoCall plugin: “Peer to peer” calling each other, but the data flows through Janus gateway
- Sip Plugin is a plugin that abstracts authing into a SIP server and then lets you do SIP calls through the browser over WebRTC
- VideoRoom is a plugin meant for many to many streaming, so like, conference calls
- TextRoom, which is a plugin that deals only with WebRTC’s data channel to stream raw data at very low latency over WebRTC.
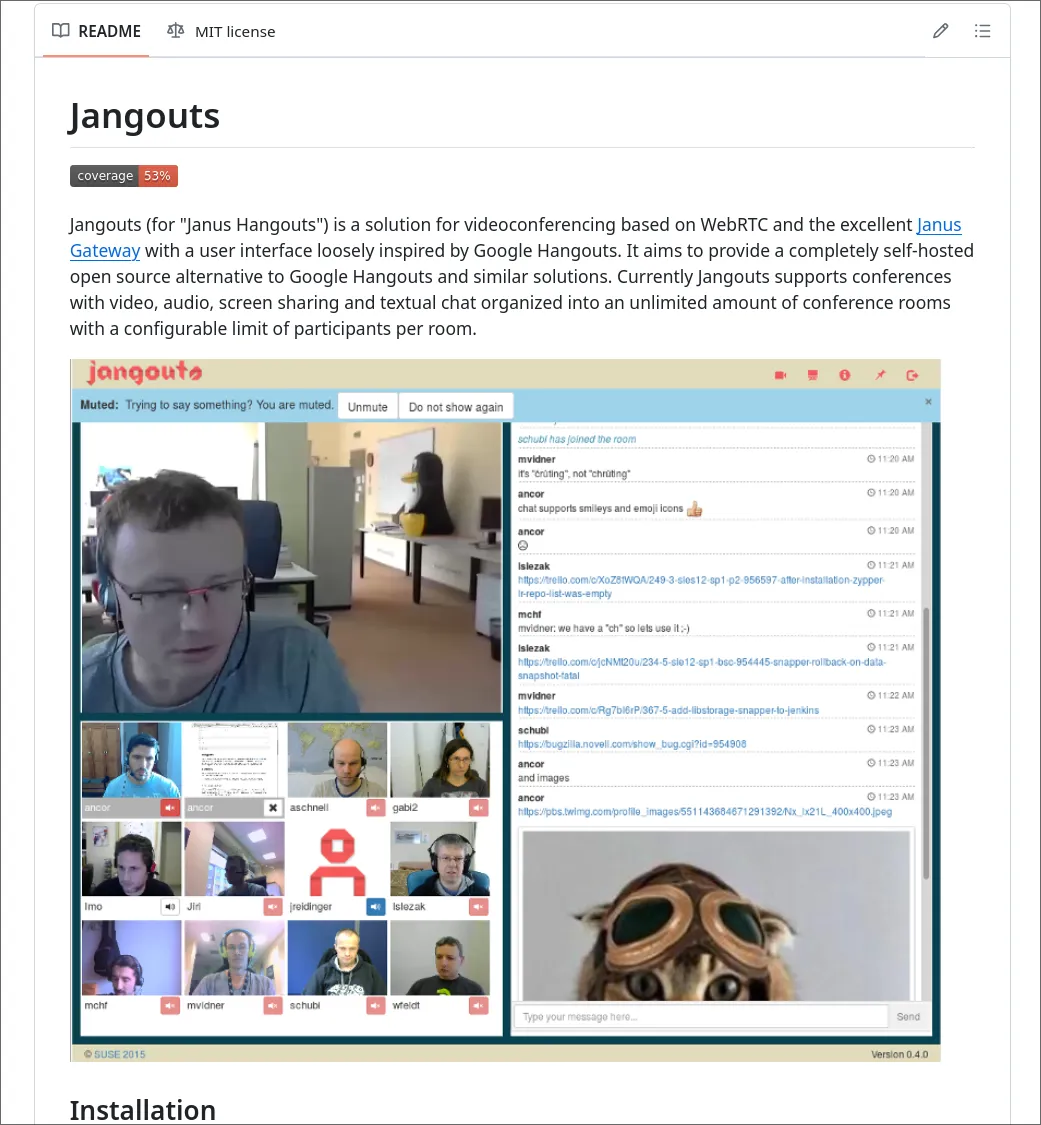
There’s a really neat project called Jangouts that lets you do google hangouts style conference calling through an open source server running Janus Gateway, which is a neat showcase of the capabilities of the plugins.
Finally, there’s an API to create plugins for Janus Gateway in C, lua, and
even javascript, if none of the preexisting plugins work. I think this is
really neat and may return to trying out their API, or once I learn C write a
native plugin, but for now I found what I needed: the streaming plugin.
The streaming Janus Gateway plugin lets you read prerecorded media or access
prerecorded media and broadcast it over WebRTC, but, more importantly, it also
lets you pass in media over
RTC. Here’s how
they word it
the plugin is configured to listen on a few ports for RTP: this means that the plugin is implemented to receive RTP on those ports and relay them to all peers attached to that stream. Any tool that can generate audio/video RTP streams and specify a destination is good for the purpose: the examples section contains samples that make use of GStreamer (http://gstreamer.freedesktop.org/) but other tools like FFmpeg (http://www.ffmpeg.org/), LibAV (http://libav.org/) or others are fine as well. This makes it really easy to capture and encode whatever you want using your favourite tool, and then have it transparently broadcasted via WebRTC using Janus. Notice that we recently added the possibility to also add a datachannel track to an RTP streaming mountpoint: this allows you to send, via UDP, a text-based message to relay via datachannels (e.g., the title of the current song, if this is a radio streaming channel). When using this feature, though, beware that you’ll have to stay within the boundaries of the MTU, as each message will have to stay within the size of an UDP packet.
Literally just what I want! How convenient. But now, we have to configure it.
To say it briefly, Janus is a pain in the neck to configure. It’s a monster of a project and there are a billion different options that all need to be configured correctly.
Janus Gateway
We talked about this a bit earlier, but Janus is a all in one WebRTC, so that means that it both is a “peer” that is sharing media, but also is the signaling server itself (the thing that tells clients to start getting content and from who).
It does the signaling through an API that it exposes, which can either be in the
form of Websockets or HTTP (or both!). It also exposes a “admin api” that you
can use to query metadata about janus, like
Configuring
First things first, Janus has its own DSL for configuring it. It’s not that bad, it’s mostly key pair stuff.
Janus provides a nice set of example configurations that have a ton of comments on their github. It’s very helpful, and I would have been totally lost (well, more totally lost than the amount of totally lost that I was) had they not had example configurations.
There’s a few different things we have to configure:
- The signaling server that
Janushosts and general configuration - The streaming plugin itself
- The admin server, which is a separate server for managing janus itself (getting information like what ports things are running on, statuses, etc)
There were a few manual things I had to set up for the configuration. First, I explicitly enabled the streaming plugin. I’m not entirely sure if this is necessary, but I believe it would at least give me an error if it couldn’t find it, which is good.
plugins: {
  enable = "janus.plugin.streaming"
}
Second, I set up an admin secret, but janus does have support for token auth
and eventually I’ll figure out how to use that. For auth, it’s not well
documented, but to pass the token when accessing you literally just add a
apisecret: "secret" header to the request.
admin_secret = "secret" # String that all Janus requests must containThere’s also a configuration section called media, which seems to be where you
put global media configuration settings.
I’ll be honest in saying I don’t totally understand every setting here, but I
did a lot of trial and error to figure things out. It seems pretty important to
do nack_optimizations for this project, which significantly helped with
stuttering.
media: {
	#ipv6 = true
	#ipv6_linklocal = true
	min_nack_queue = 1200
	rtp_port_range = "20000-40000"
	dtls_mtu = 1500
	no_media_timer = 2
	slowlink_threshold = 4
	twcc_period = 100
	dtls_timeout = 500

	# Janus can do some optimizations on the NACK queue, specifically when
	# keyframes are involved. Namely, you can configure Janus so that any
	# time a keyframe is sent to a user, the NACK buffer for that connection
	# is emptied. This allows Janus to ignore NACK requests for packets
	# sent shortly before the keyframe was sent, since it can be assumed
	# that the keyframe will restore a complete working image for the user
	# anyway (which is the main reason why video retransmissions are typically
	# required). While this optimization is known to work fine in most cases,
	# it can backfire in some edge cases, and so is disabled by default.
	nack_optimizations = true

	# If you need DSCP packet marking and prioritization, you can configure
	# the 'dscp' property to a specific values, and Janus will try to
	# set it on all outgoing packets using libnice. Normally, the specs
	# suggest to use different values depending on whether audio, video
	# or data are used, but since all PeerConnections in Janus are bundled,
	# we can only use one. You can refer to this document for more info:
	# https://tools.ietf.org/html/draft-ietf-tsvwg-rtcweb-qos-18#page-6
	# That said, DON'T TOUCH THIS IF YOU DON'T KNOW WHAT IT MEANS!
	dscp = 46
}
Getting the streaming plugin working at first seemed really annoying since the
plugins are all C files that have to be built and then placed in a specific
folder on your system, which is not that portable. However, analyzing the
janus cli (the thing you use to launch janus gateway), I figured out that
you can set flags to specify where to look things up. Also, the nix build of
janus comes with all the plugins!
$JANUS \
    -P "$JANUS_INSTALL" \
    -F "$JANUS_CONFIG_DIR" \
    -C "$JANUS_CONFIG"
Now these official names are really confusing. TLDR: $JANUS_INSTALL is the
directory where the janus binary and plugin binaries live, $JANUS_CONFIG_DIR
is the location where plugin configuration files go, and $JANUS_CONFIG is
where the general configuration file goes.
Now, where is Janus installed? Well, I’ve installed it with nix, so the location
it’s installed will look something like
/nix/store/jfieao...hash....fjeioa/bin/janus, which could change and is bad
practice to directly reference. Eventually, I’ll generate a shell script using
pkgs.writeShellScriptBin, where I can then reference Janus’s root path in the
generator for the shell script as pkgs.janus. To get started though, I did
just do it in a janky way with which. I’ll clean it up eventually.
The directory where janus lives looks like
/nix/store/46c284cqdgia0dxzmi8rs5vzwszxalwg-janus-gateway-1.2.3
├── bin
│   ├── janus
│   ├── janus-cfgconv
│   ├── janus-pp-rec
│   └── mjr2pcap
└── lib
    └── janus
        ├── events
        │   ├── libjanus_gelfevh.la
        │   ├── libjanus_gelfevh.so -> libjanus_gelfevh.so.2.0.3
        │   ├── libjanus_gelfevh.so.2 -> libjanus_gelfevh.so.2.0.3
        │   ├── libjanus_gelfevh.so.2.0.3
        │   ├── libjanus_sampleevh.la
        │   ├── libjanus_sampleevh.so -> libjanus_sampleevh.so.2.0.3
        │   ├── libjanus_sampleevh.so.2 -> libjanus_sampleevh.so.2.0.3
        │   ├── libjanus_sampleevh.so.2.0.3
        │   ├── libjanus_wsevh.la
        │   ├── libjanus_wsevh.so -> libjanus_wsevh.so.2.0.3
        │   ├── libjanus_wsevh.so.2 -> libjanus_wsevh.so.2.0.3
        │   └── libjanus_wsevh.so.2.0.3
        ├── loggers
        │   ├── libjanus_jsonlog.la
        │   ├── libjanus_jsonlog.so -> libjanus_jsonlog.so.2.0.3
        │   ├── libjanus_jsonlog.so.2 -> libjanus_jsonlog.so.2.0.3
        │   └── libjanus_jsonlog.so.2.0.3
        ├── plugins
        │   ├── libjanus_audiobridge.la
        │   ├── libjanus_audiobridge.so -> libjanus_audiobridge.so.2.0.3
        │   ├── libjanus_audiobridge.so.2 -> libjanus_audiobridge.so.2.0.3
        │   ├── libjanus_audiobridge.so.2.0.3
        │   ├── libjanus_echotest.la
        │   ├── libjanus_echotest.so -> libjanus_echotest.so.2.0.3
        │   ├── libjanus_echotest.so.2 -> libjanus_echotest.so.2.0.3
        │   ├── libjanus_echotest.so.2.0.3
        │   ├── libjanus_nosip.la
        │   ├── libjanus_nosip.so -> libjanus_nosip.so.2.0.3
        │   ├── libjanus_nosip.so.2 -> libjanus_nosip.so.2.0.3
        │   ├── libjanus_nosip.so.2.0.3
        │   ├── libjanus_recordplay.la
        │   ├── libjanus_recordplay.so -> libjanus_recordplay.so.2.0.3
        │   ├── libjanus_recordplay.so.2 -> libjanus_recordplay.so.2.0.3
        │   ├── libjanus_recordplay.so.2.0.3
        │   ├── libjanus_sip.la
        │   ├── libjanus_sip.so -> libjanus_sip.so.2.0.3
        │   ├── libjanus_sip.so.2 -> libjanus_sip.so.2.0.3
        │   ├── libjanus_sip.so.2.0.3
        │   ├── libjanus_streaming.la
        │   ├── libjanus_streaming.so -> libjanus_streaming.so.2.0.3
        │   ├── libjanus_streaming.so.2 -> libjanus_streaming.so.2.0.3
        │   ├── libjanus_streaming.so.2.0.3
        │   ├── libjanus_textroom.la
        │   ├── libjanus_textroom.so -> libjanus_textroom.so.2.0.3
        │   ├── libjanus_textroom.so.2 -> libjanus_textroom.so.2.0.3
        │   ├── libjanus_textroom.so.2.0.3
        │   ├── libjanus_videocall.la
        │   ├── libjanus_videocall.so -> libjanus_videocall.so.2.0.3
        │   ├── libjanus_videocall.so.2 -> libjanus_videocall.so.2.0.3
        │   ├── libjanus_videocall.so.2.0.3
        │   ├── libjanus_videoroom.la
        │   ├── libjanus_videoroom.so -> libjanus_videoroom.so.2.0.3
        │   ├── libjanus_videoroom.so.2 -> libjanus_videoroom.so.2.0.3
        │   └── libjanus_videoroom.so.2.0.3
        └── transports
            ├── libjanus_http.la
            ├── libjanus_http.so -> libjanus_http.so.2.0.3
            ├── libjanus_http.so.2 -> libjanus_http.so.2.0.3
            ├── libjanus_http.so.2.0.3
            ├── libjanus_pfunix.la
            ├── libjanus_pfunix.so -> libjanus_pfunix.so.2.0.3
            ├── libjanus_pfunix.so.2 -> libjanus_pfunix.so.2.0.3
            ├── libjanus_pfunix.so.2.0.3
            ├── libjanus_websockets.la
            ├── libjanus_websockets.so -> libjanus_websockets.so.2.0.3
            ├── libjanus_websockets.so.2 -> libjanus_websockets.so.2.0.3
            └── libjanus_websockets.so.2.0.3
So to reference the plugins in the correct places I can write a bash script that
uses janus like this
echo "Starting janus in $PWD"
CONFIGS=./src/janus/configs
JANUS_INSTALL=$(dirname "$(dirname "$(which janus)")")
echo "$JANUS_INSTALL"
janus -P "$JANUS_INSTALL/lib/janus/plugins" -F "$CONFIGS" -C "./src/janus/janus.jcfg"
dirname just gets the directory something is located in, so I’m effectively
hopping two directories up.
Once I was able to load the streaming plugin, I then had to configure it. They
have this
handy example
of various streaming plugin setups for different use cases.
The first example that called out to me is this one:
# This is an example of an RTP source stream, which is what you'll need
# in the vast majority of cases: here, the Streaming plugin will bind to
# some ports, and expect media to be sent by an external source (e.g.,
# FFmpeg or Gstreamer). This sample listens on 5002 for audio (Opus) and
# 5004 for video (VP8), which is what the sample gstreamer script in the
# plugins/streams folder sends to. Whatever is sent to those ports will
# be the source of a WebRTC broadcast users can subscribe to.
#
rtp-sample: {
	type = "rtp"
	id = 1
	description = "Opus/VP8 live stream coming from external source"
	metadata = "You can use this metadata section to put any info you want!"
	audio = true
	video = true
	audioport = 5002
	audiopt = 111
	audiocodec = "opus"
	videoport = 5004
	videopt = 100
	videocodec = "vp8"
	secret = "adminpwd"
}
Since it claims to do exactly what I want: stream media over RTP.
Okay, so now I just place all the janus configurations into the right spots,
run janus using my hacky bash script, and pray it works.
It didn’t at first, or for the first day of trying to get it to, but eventually I got it to a functional state where janus would at least run.
Now what? I’m not streaming media, but now I can stream through RTP on localhost.
The next step was to figure out how to connect to janus, which is totally
a pain in the neck and nontrivial.
Browser again
Modern browsers are designed to support WebRTC connections. They provide an API
that you can use to create PeerConnections, do handshaking, set up media
streams, and all that fun stuff.
It looks something like this (signalingServer is a websocket server)
Note that this example is ai-written/modified, since it’s a very minimal short example of what you’d do to get webrtc working.
ICE is a network technique to establish peer to peer connections while going through some central server (google hosts a commonly used one).
// 1. Create peer connection
const pc = new RTCPeerConnection()

// 2. Create and set local description
const offer = await pc.createOffer()
await pc.setLocalDescription(offer)

// 3. Send offer to remote peer (via signaling server)
signalingServer.send(JSON.stringify(offer))

// 4. Receive answer from remote peer
signalingServer.onmessage = async (event) => {
  const answer = JSON.parse(event.data)
  await pc.setRemoteDescription(answer)
}

// 5. Exchange ICE candidates
pc.onicecandidate = (event) => {
  if (event.candidate) {
    signalingServer.send(JSON.stringify(event.candidate))
  }
}

// 6. Handle incoming ICE candidates
signalingServer.onmessage = async (event) => {
  const iceCandidate = JSON.parse(event.data)
  await pc.addIceCandidate(iceCandidate)
}

// 7. Handle getting streams
pc.ontrack = (event) => {
  const [remoteStream] = event.streams
  console.log('Received remote stream', remoteStream)
  // Use the remoteStream, e.g., attach it to a video element
  const videoElement = document.querySelector('#remoteVideo')
  videoElement.srcObject = remoteStream
}

// 8. Connection established
pc.onconnectionstatechange = (event) => {
  if (pc.connectionState === 'connected') {
    console.log('WebRTC connection established!')
  }
}
In this case though, I didn’t actually create the websocket server, and
janus’s is much more complicated than this. It isn’t a matter of just
accepting the first message received, but rather janus requires you actually
have a “conversation” and tell it what you want — you ask for a list of
streams, choose one by id, etc, all while sending heartbeats. It’s annoying to
work with, but they provide a
javascript sdk with type
declarations.
A Little React
To procrastinate figuring out how to use their sdk, I started off by setting up
a super simple vite react app so that I could nicely abstract things.
I learned a bit about vite here, since I hadn’t used it before. It seems like
vite’s entrypoint is an index.html file that looks something like
<body>
  <div id="root"></div>
  <script type="module" src="/src/main.tsx"></script>
</body>
Where vite hosts a server, and then automatically intercepts requests for
/src/main.tsx and serves a javascript bundle (which it can prebuild or
dynamically generate).
I found this
random helpful example
usage that was pretty helpful for figuring out how to interface with janus.
React hooks are ways to move logic
away from your components so that you can reuse logic. The difference between
hooks and regular functions is that you can use hooks within hooks, so,
like, hooks can call useState to maintain their own states.
The way you define a hook is by placing it in a file with the use prefix, and
then provide a function as a default export. So like, in my case,
useJanusStream.ts and export default function useJanusStream.
In that function body we can use hooks like useState. Okay, so let’s start
writing the logic for connecting to janus and getting a stream into a
<video> element
There are docs on their
javascript sdk, but it’s kinda awful to work with. It sends all the right api
requests and works well enough, but it was implemented before const and
async/await, so it’s full of callbacks and is awful to deal with.
To start, we init Janus, which is already kinda yucky — we’re setting a
global state of how Janus is to behave.
Janus.init({
  debug: true,
  dependencies: Janus.useDefaultDependencies({ adapter }),
  callback: () => {
We get the adapter with import adapter from "webrtc-adapter", which is from
here. It’s a common package that
exposes the WebRTC api in a browser agnostic way.
Okay, now we instantiate a new Janus (yes, init just set a global config state, it didn’t actually create a connection or anything like that)
const janus = new Janus({
    server: servers, // a list of websocket/http server IPs (of janus servers)
    apisecret: "secret",
    success: () => {
And, once the Janus gets created we handle the success with
janus.attach({
    plugin: "janus.plugin.streaming",
This attaches the streaming plugin, which makes an api request that asserts that
there is a streaming plugin running on the janus server, and then (as usual)
has a callback for once the assertion is done…
success: (receivedStreamingPluginHandle) => {
  console.debug("Got streaming plugin information");
  streamingPluginHandle = receivedStreamingPluginHandle;
  console.debug("Requesting stream from plugin");
  streamingPluginHandle.send({
    message: { request: "list" },
    success: (list: any) => {
      console.debug("Listed!", list);
    },
  });
  streamingPluginHandle.send({
    message: { request: "info", id: 1 },
    success: (info: any) => {
      console.debug("Got info", info);
    },
  });
  streamingPluginHandle.send({
    message: { request: "watch", id: 1 },
    success: (resp: any) => {
      console.debug("Resp", resp);
      console.debug(
        "Watching stream success. Now waiting to start stream.",
      );
    },
  });
},
Once it is ready, we ask for a list of streams (to log, for debugging purposes for now), we get information on the stream that should be the one we are going to connect to, and then we ask to watch the stream.
That last step is the tricky part — in order to obtain a MediaStreamTrack,
which is just raw video/audio, which we can create a MediaStream from, which
can be slotted into a <video> element, we need to ask janus to send us the
stream, and define a callback for once it’s done so.
Before it can send the stream, it’ll ask to do an auth handshake, which
onmessage: (msg, jsep) => {
  console.debug("Received msg from Janus server", msg, jsep);
  if (streamingPluginHandle === null) return;
  if (jsep === undefined) return;
  console.debug("Received JSEP!", jsep);
  console.debug("Answering the JSEP request.");
  streamingPluginHandle.createAnswer({
    jsep: jsep,
    media: { audioSend: false, videoSend: false },
    success: (jsep: any) => {
      console.debug("Successful SDP answer created");
      let body = { request: "start" };
      streamingPluginHandle.send({ message: body, jsep: jsep });
    },
    error: (error: any) => {
      console.error("WebRTC Error:", error);
    },
  });
},
JSEP’s a complicated handshake that goes on to establish a webrtc connection.
It’s mostly abstracted away from us.
Once the handshake is done, we just define a onRemoteTrack function for when
the MediaTrack is ready.
onremotetrack: (track: MediaStreamTrack) =>
    onReceivedMediaTrack(track),
Then we have a MediaStreamTrack, which is a “container” of sorts for the
inbound video stream. We can attach it to our <video> element by creating a
MediaStream with it. A MediaStream is a collection of tracks — so, like,
audio and video, for example.
It looks something like this…
const setupStream = () => {
  if (videoPlayer.current && mediaStreamTrack.readyState === 'live') {
    const newMediaStream = new MediaStream()
    newMediaStream.addTrack(mediaStreamTrack)
    videoPlayer.current.srcObject = newMediaStream
  }
}
MediaStreamTracks have a enum for their readyState, so if it’s “live” (video
is streaming), then create a MediaStream with the track, and then set our
video element (which we can grab with a selector, or, in this case, a
useRef)‘s srcObject (what it’s playing) to the track we just received.
Okay, so I implemented all of this, and, to put it briefly, it did connect, but no video would play.
Video Encoding Transcoding
The next major obstacle
Other Cool Things